01 · Subgrade
The point of no return
Compacted subgrade. The ±0.00 level is set here, and every other elevation is measured from it.
Veridom walks you through a build or a renovation step by step — and turns your phone into a journal of evidence: photos at checkpoints, promises in writing, a budget under control.
Free for private owners at the dream and planning stage.
1 · The point of no return
01 · Subgrade
Compacted subgrade. The ±0.00 level is set here, and every other elevation is measured from it.
02 · Insulation
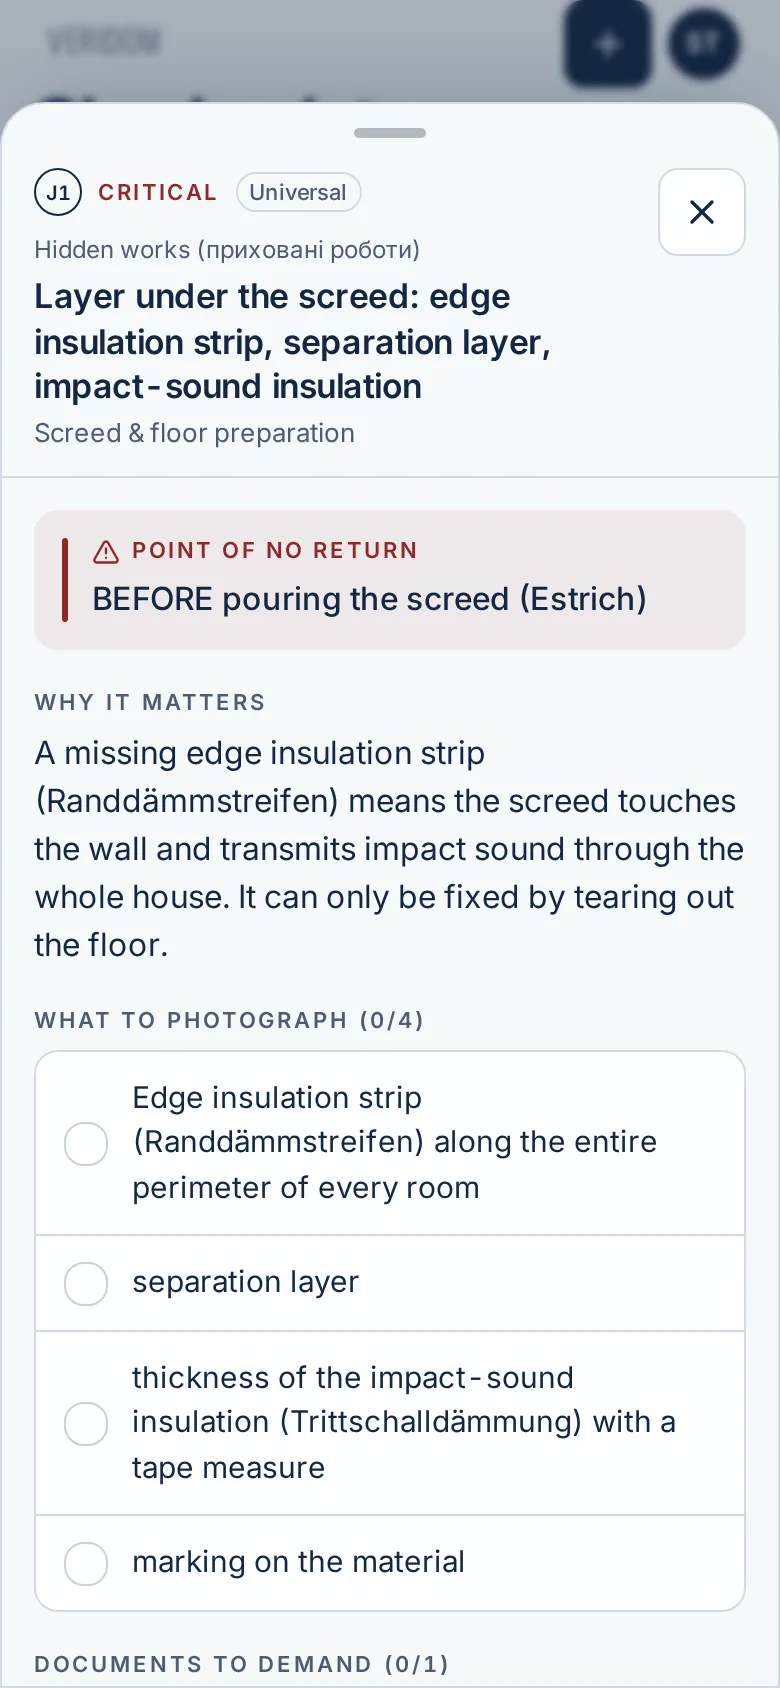
The layer under the screed. Once it is covered you cannot check the thickness — only now.
What to photograph
The board's product stamp in frame, a folding rule at the cut edge.
03 · Reinforcement
The last moment it is visible. Mesh spacing, concrete cover, laps — all of it is here.
Point of no return — what to photograph
The mesh overall, the spacing from spacer to spacer, the lapped joints.
04 · Concrete
Poured. Everything below it no longer exists for inspection — only your photographs do.
05 · Screed
Levelling under the finish floor. The second closed layer inside a week.
06 · Floor finish
Finished floor, +0.42 above the subgrade. The detail is closed for good — and that is only the first forty-two centimetres of the house.
07 · Walls
Masonry, openings, the internal wall. Until the plaster goes on, the geometry is visible and still fixable.
What to photograph
Each wall end to end with a rule from the corner, every opening with its dimensions, the block's product stamp in frame.
08 · Services in the walls
Pipes, cable, conduit, the connections to the wet rooms. After plastering the wall is solid: finding a pipe later means finding it with a drill.
Point of no return — what to photograph
Each wall before plastering, end to end, with a rule from the corner and from the floor. Separately: the connection points, and the bathroom waterproofing before the tiles.
09 · Floor slab and ring beam
The ring beam on the walls and the floor slab above. The beam's reinforcement is visible right up until the mixer arrives.
What to photograph
The ring beam reinforcement all the way round, the bearing of the slabs, the anchors.
10 · Rafters and roof insulation
The rafter structure, the vapour barrier, the insulation. Once the loft is lined you will only see this again by opening the ceiling.
Point of no return — what to photograph
The rafter bearing points, continuity of the vapour barrier, the laps in the membrane, the insulation depth at the cut edge.
11 · Roof covering
The house is closed, +6.40 above ±0.00. Everything inside the assemblies now exists only in your photographs.
2 · The problem
Building or renovating in Germany? The bank pays out against construction progress — and wants that progress evidenced. Subsidy programmes demand evidence before and after the measure. And in a dispute with the contractor, the side that documented wins: photos before anything is closed up, deadlines in writing, the Abnahme (acceptance) not done in passing. Most private owners document chaotically — or not at all.
3 · The solution
Veridom ties every check to the moment after which nothing can be changed. Not «have the quality inspected», but: photograph this, demand this in writing — before the concrete arrives.
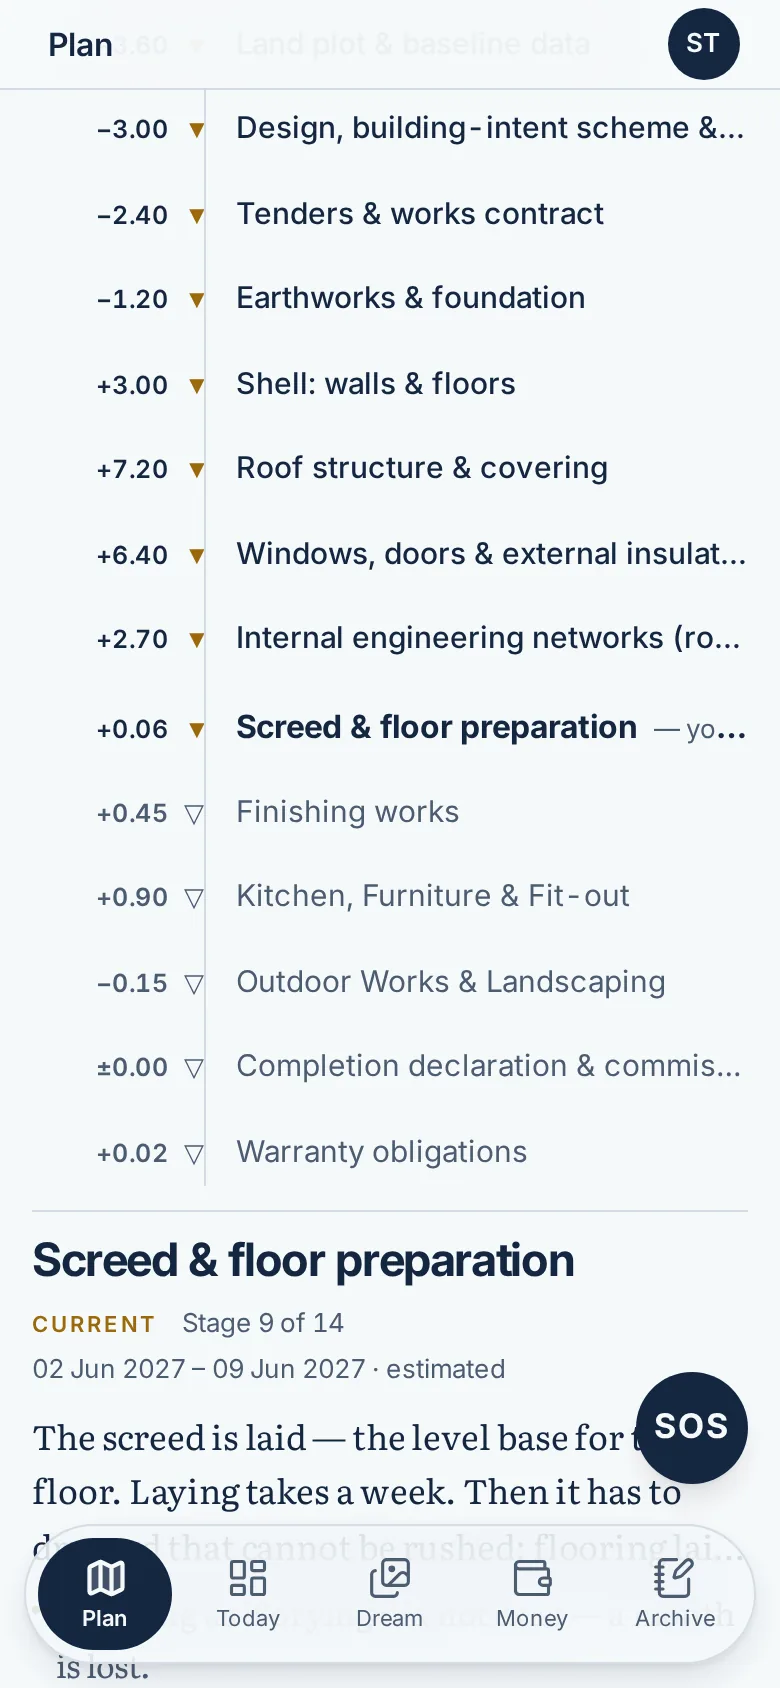
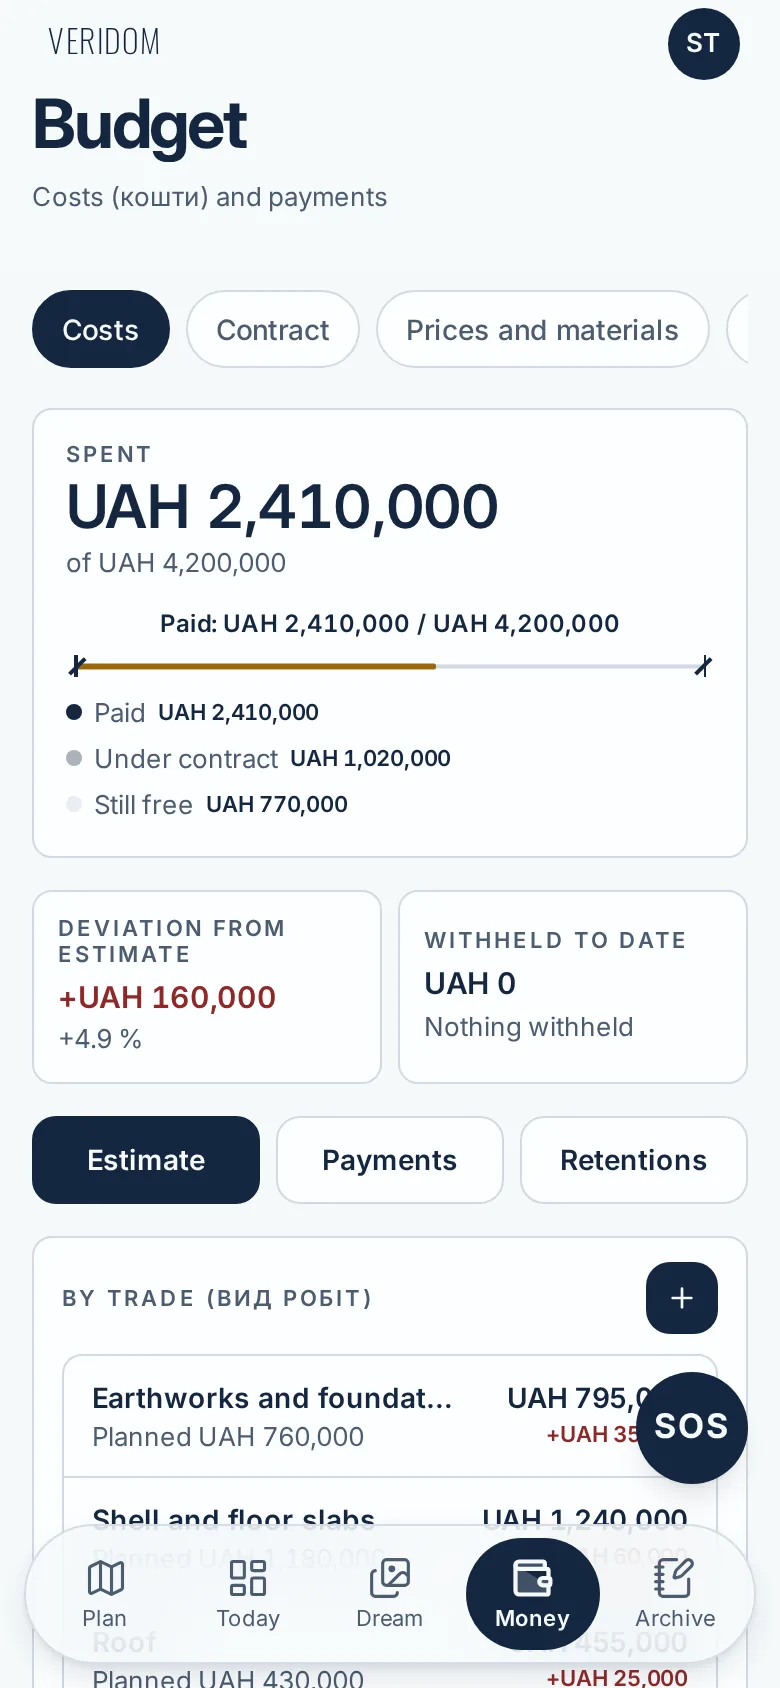
4 · Capabilities
A plan that fits the country and the project — new build or renovation.
Checkpoints: what to check and photograph before the firm moves on.
Budget and payments: what is paid, what is held back — and why.
Documents and decisions in one place — ready for the bank and the subsidy office.
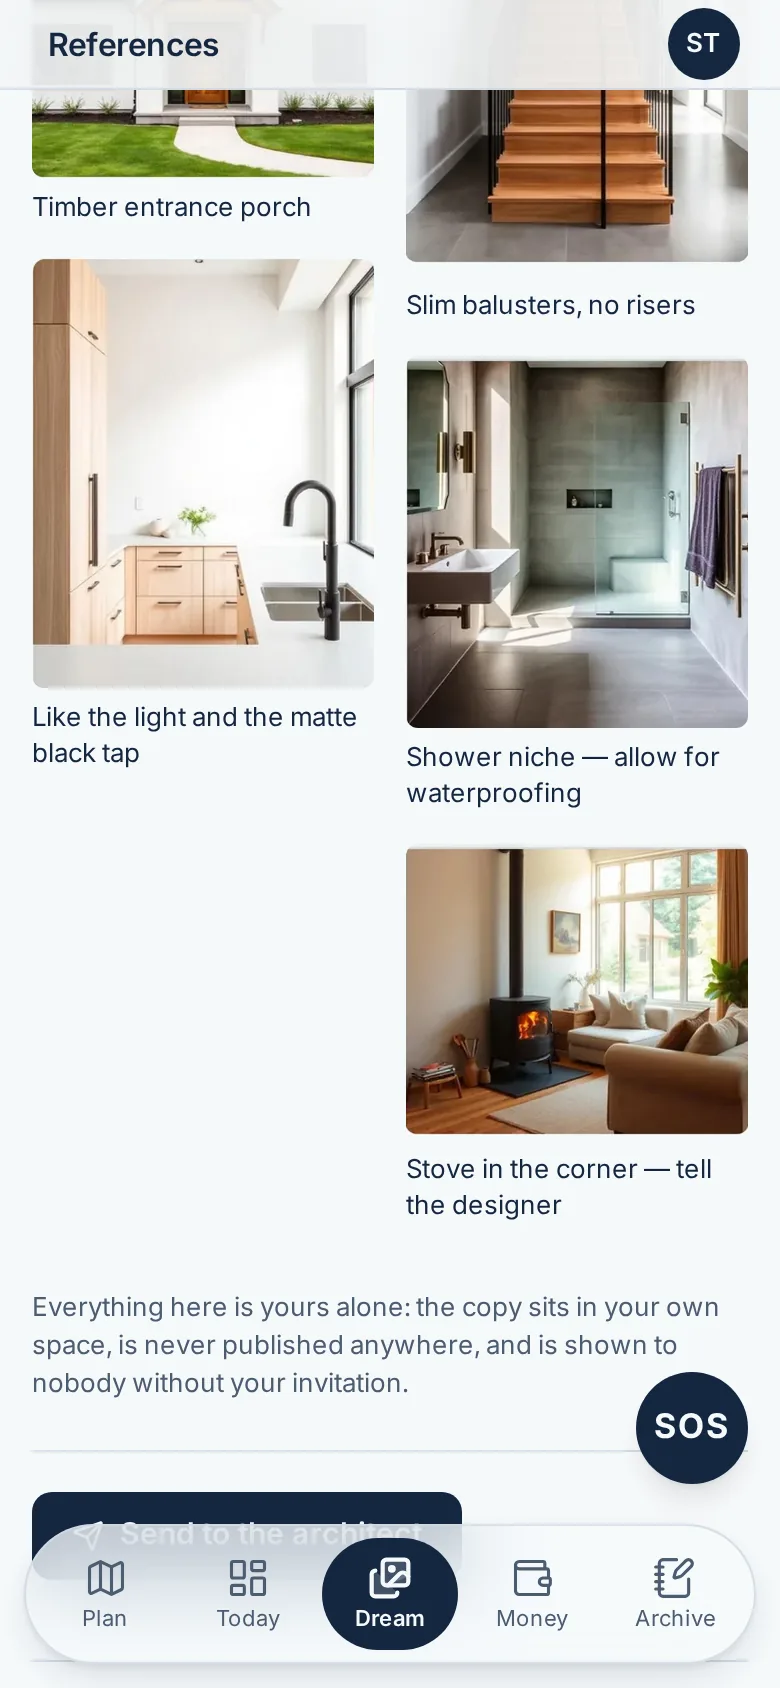
Construction terms in human language.
Collect ideas before there is a plan.
5 · Partners
We don't sell the app one at a time. We give it to those who already have those people.
The payout waits on proof of construction progress. Whoever builds with Veridom brings the basis of every Bautenstandsbericht (construction progress report) along: photos from the checkpoints, entries, budget. Fewer projects that stall.
A pilot with one loan cohort.
You accompany people through renovation and new builds. Veridom keeps your clients on course between appointments: what to photograph, what to demand in writing — and it is all laid out when you arrive on site.
A pilot with one office or association.
A transparent Abnahme (acceptance) and warranty period: protocol, photos, deadlines in one app. Fewer disputes with customers — more trust in the brand.
A documented site is a lower risk — and a faster, calmer claims process.
Security and integration
Client data is stored encrypted and transmitted only over secured channels. Every user sees only their own project: access is restricted at the database level, not merely in the interface. We do not sell data and use neither advertising identifiers nor behavioural analytics. A client can download everything of theirs as a single archive, or delete the account together with all photos and documents, at any time. The company is registered in the EU and works under the GDPR. Before a pilot we go through your security review and sign a data processing agreement.
We fit Veridom to your internal processes, not the other way round. Partner branding, sign-in through your system, handover of dated documentation into your lending, acceptance or reporting processes via API or webhooks. We do the technical part: your team receives a finished connection, not an implementation project. Any exchange of data happens only with the client's explicit consent and only to the extent they chose themselves.
6 · The principle
We don't sell partners the client's data. The partner gets a licence and visibility; the documentation belongs to the client — only they can pass it on. The moment people know their bank or insurer sees their photos, they stop photographing problems.
7 · Contact
Leave your contact — we'll get back to you.